
티스토리 뷰
저번 게시물 curd 게시판 만들기(1)과 이어지는 포스팅입니다~
https://zellwk.com/blog/crud-express-mongodb/
저번 포스팅에서 말했듯이 위의 링크를 참고하였고, 상세한 MongoDB 설치법은 위의 링크를 참고해주세요!
<MongoDB>
crud게시판에서 우리는 MongoDB를 사용하여 구현할 것이다.
1. MongoDB 설치하기
npm install mongodb --save
const MongoClient = require('mongodb').MongoClient

MongoClient.connect('mongodb-connection-string', (err,
client) => {
	// do something here
})
2. MongoDBAtlas에서 데이터베이스를 생성하자
https://www.mongodb.com/cloud/atlas
Managed MongoDB Hosting | Database-as-a-Service
Host MongoDB in the cloud with MongoDB Atlas, the official database-as-a-service, on AWS, Azure and GCP. Try free!
www.mongodb.com
저의 경우 구글로 바로 서비스를 진행했고, 계정을 만든 후 새로운 프로젝트를 만들어줍니다.
예시와 동일한 star-wars의 이름으로 프로젝트를 하나 생성했습니다.
3. Build a Cluster
free cluster를 선택하고, create cluster를 누르면 'Your cluster is being created'의 상태로 5분정도 기다리게 된다.
const MongoClient = require('mongodb').MongoClient
const url = 'mongodb+srv://seung:ch8925@cluster0.oqhbr.mongodb.net/test?retryWrites=true&w=majority'


MongoClient.connect(url, {
        useUnifiedTopology: true
} , function(err, database) {
        if(err) {
                console.error("MongoDB 연결 실패", err);
                return;
        }
        console.log("Connected to Database")
        const db = database.db('star-wars-quotes')
        // app.use , app.get , app.post, app.listen 사용해서 db작업!
})
이렇게 하면 성공적으로 데이터베이스와 연결할 수 있다.
<CRUD - CREATE>
Database를 큰 방으로 생각하고, collection이라는 박스들을 가지고 있다고 쉽게 생각하자
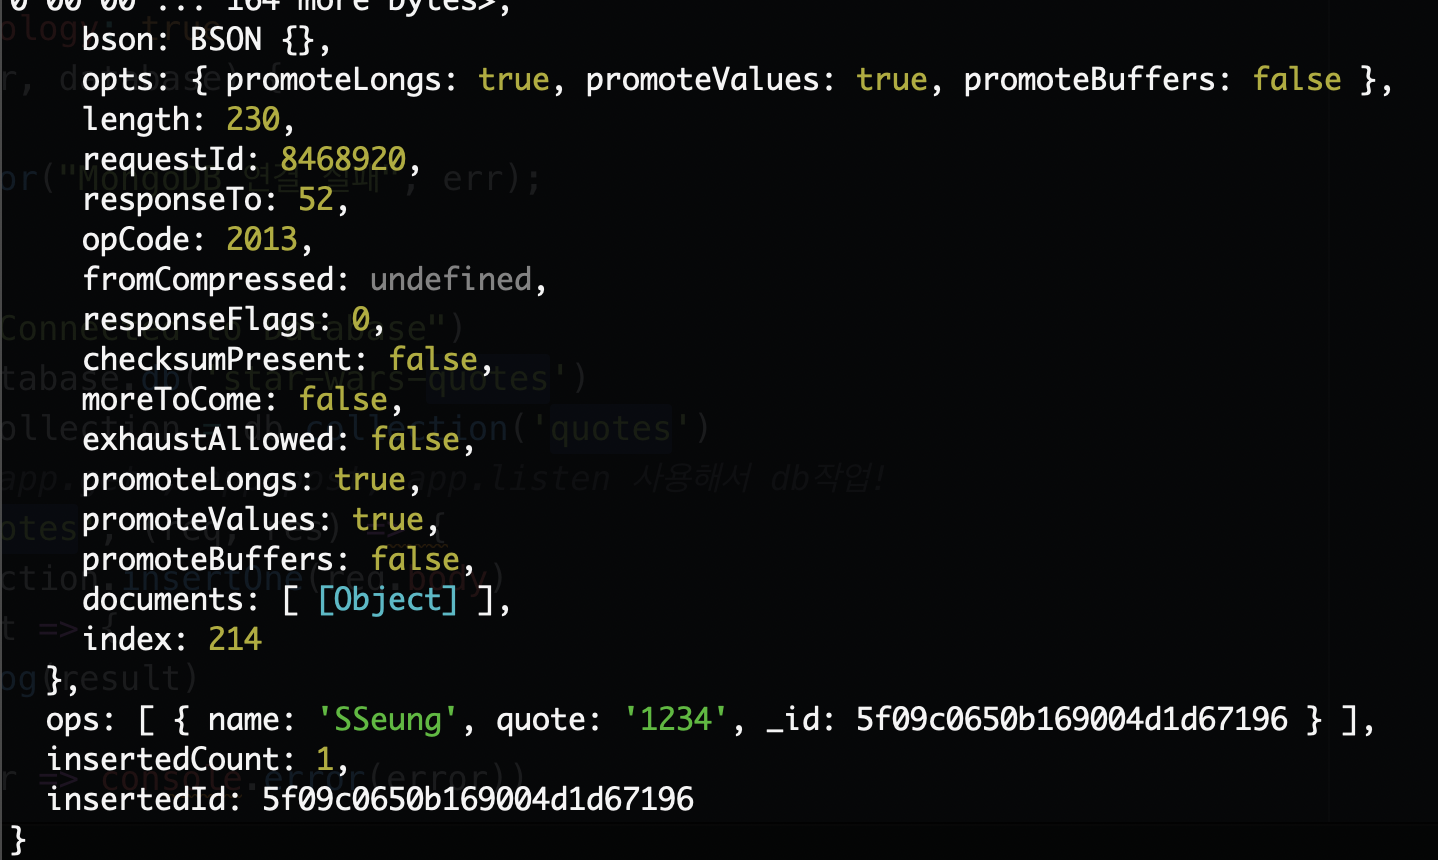
정상적으로 데이터베이스가 연결됐다면, 터미널이 이러한 정보들이 출력되는 것을 확인할 수 있다.
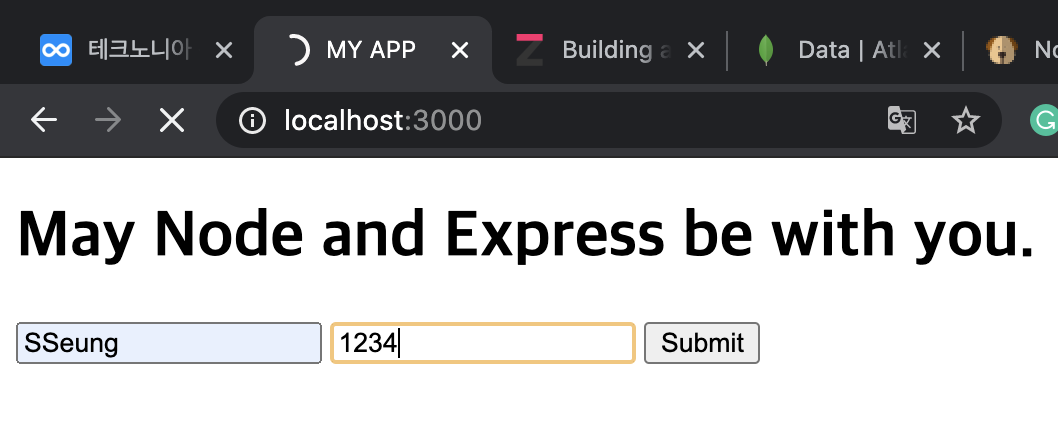
그런데 Submit을 누르면 계속 로딩이 돌아가고 있는 것을 알 수 있다.
--> 이 경우, 우리는 브라우저에서 '/' 로 리디렉션 시켜주자!
app.post('/quotes', (req, res) => {
  quotesCollection.insertOne(req.body)
    .then(result => {
      res.redirect('/')
    })
    .catch(error => console.error(error))
})
그러면 quotes로 post된 정보를 읽어오는 과정을 해보자
1. MongoDB Atlas에서 quotes 정보를 읽어오자
- find method를 통해 toArray로 배열의 형태로 받아옴!
app.get('/', (req, res) => {
	const cursor = db.collection('quotes').find().toArray()
    	.then(results => {
        	console.log(results)
        })
    .catch(error => console.error(error))
})
2. HTML에 quotes를 rendering하자
: Pug, Embedded JavaScript, Nunjucks와 같은 template engine을 통해 HTML로 불러온다
이번 예시에서는 Embedded JavaScript (EJS) 사용!
- EJS 설치하기
- npm install ejs --save
- view engine을 ejs로 세팅하기
- app.set('view engine', 'ejs')
- app.use, app.get, app.post method 전에 위치해야함!
- app.set('view engine', 'ejs')
- res.render(view, locals)
- view: 우리가 rendering할 파일의 이름을 의미한다, 이 파일은 무조건 'views' 폴더에 위치해야 한다!
- locals: 파일에 넘겨질 데이터
- views directory를 생성하고, index.ejs 파일을 생성한다
- mkdir views
- touch views/index.ejs
- 이때동안 만든 index.html의 내용을 모두 index.ejs에 복사한다
- app.get 안에서 res.render('index.ejs', { quotes: results }) 추가하기
// server.js
app.get('/', (req, res) => {
		// res.sendFile(__dirname + '/index.html')
		const cursor = db.collection('quotes').find().toArray()
    	.then(results => {
			res.render('index.ejs', { quotes: results })
      })
    	.catch(error => console.error(error))

})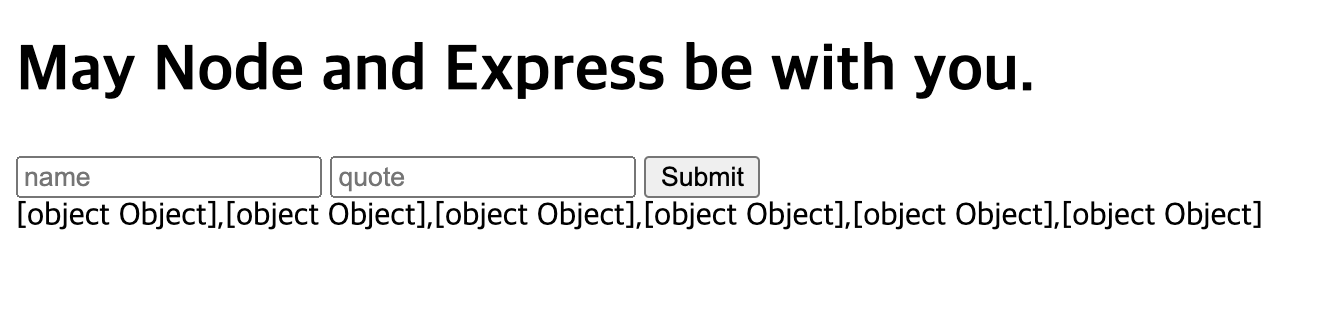
현재는 quote의 값이 [object Object]의 형식으로 출력되기 때문에 index.ejs에서 바꿔서 출력해줘야 한다!

현재까지의 전체 코드
// server.js
const express = require('express');
const app = express();
const bodyParser= require('body-parser');
const MongoClient = require('mongodb').MongoClient;
const url = 'mongodb+srv://seung:ch8925@cluster0.oqhbr.mongodb.net/test?retryWrites=true&w=majority';

// server와 browser가 연결될때까지 기다리는 것
app.listen(3000, function() {
	console.log('listening on 3000')
});


// crud handlers

MongoClient.connect(url, {
	useUnifiedTopology: true
} , function(err, database) {
	if(err) {
		console.error("MongoDB 연결 실패", err);
		return;
	}
	console.log("Connected to Database")
	const db = database.db('star-wars-quotes')
	const quotesCollection = db.collection('quotes')

	// app.use , app.get , app.post, app.listen 사용해서 db작업!
	app.set('view engine', 'ejs');
	// body-parser
	app.use(bodyParser.urlencoded({ extended: true }));

	app.post('/quotes', (req, res) => {
		quotesCollection.insertOne(req.body)
		.then(result => {
			res.redirect('/')
		})
		.catch(error => console.error(error))
	});

// sendFile method를 통해 index.html파일로 연결하자
	app.get('/', (req, res) => {
		// res.sendFile(__dirname + '/index.html')
		const cursor = db.collection('quotes').find().toArray()
    	.then(results => {
				res.render('index.ejs', { quotes: results })
      })
    	.catch(error => console.error(error))

	})

});

// index.ejs
<!DOCTYPE html>
<html lang="en">
<head>
  <meta charset="UTF-8">
  <title>Star Wars Quote App</title>
</head>
<body>
  <h1> May Node and Express be with you. </h1>

	<form action="/quotes" method="POST">
	  <input type="text" placeholder="name" name="name">
	  <input type="text" placeholder="quote" name="quote">
	  <button type="submit">Submit</button>
	</form>

  <h2> Quotes </h2>

  <ul class="quotes">
    <!-- Loop through quotes -->
    <% for(var i = 0; i < quotes.length; i++) {%>
      <li class="quote">
        <!-- Output name from the iterated quote object -->
        <span><%= quotes[i].name %></span>:
        <!-- Output quote from the iterated quote object -->
        <span><%= quotes[i].quote %></span>
      </li>
    <% } %>
  </ul>

</body>
</html>
<CRUD - UPDATE>
UPDATE기능에서는 첫번째 quote를 ~가 쓴 글로 바꾸는 것을 연습할 것이다.
- index.ejs에 버튼 한개 추가하기!
- 외부 자바스크립트 파일 생성하기
- mkdir public
- touch public/main.js
- express가 public 폴더에 접근할 수 있도록 설정하기
- app.use(express.static('public'))
- 버튼이 클릭되면 PUT request를 보낸다
- PUT request를 보내기 위해 Fetch API를 사용한다!
- fetch(endpoint, options)
- 우리의 경우 /quotes에 요청을 보낼 것이기 때문에 endpoint를 /quotes라고 설정한다!
// main.js
const update = document.querySelector('#update-button')

update.addEventListener('click', _ => {
  // Send PUT Request here
  fetch('/quotes', {
  	method: 'put',
    // server에 우리가 보내는 JSON data의 Content-Type을 설정해줘야 한다.
    headers: { 'Content-Type' : 'application/json' },
    // JSON으로 보낸 데이터를 변환해야 한다
    body: JSON.stringify({
    	name: 'BabO',
        quote: 'This is changed quote. Surprise!!'
    })
  })
})
5. JSON을 읽을 수 있도록 한다.
- app.use(bodyParser.json()) 추가하기
6. PUT method를 통해 우리가 보낸 PUT request를 처리한다.
app.put('/quotes', (req, res) => {
	console.log(req.body)
})
7. findOneAndUpdate method를 통해 데이터베이스의 한 아이템을 변경한다
quotesCollection.findOneAndUpdate(
query, // key-value쌍의 collection을 필터링해준다
update, // 변경하고 싶은 것
options // update request의 추가적인 옵션
)
.then(result => {} )
.catch(error => console.error(error))
app.put('quotes', (req, res) => {
quotesCollection.findOneAndUpdate(
{name: 'SSeung'},
{
$set: {
name: req.body.name,
quote: req.body.quote
}
},
{
// 우리가 찾는 쿼리가 없을 경우 setting값을 quotes에 추가한다
upsert: true
}
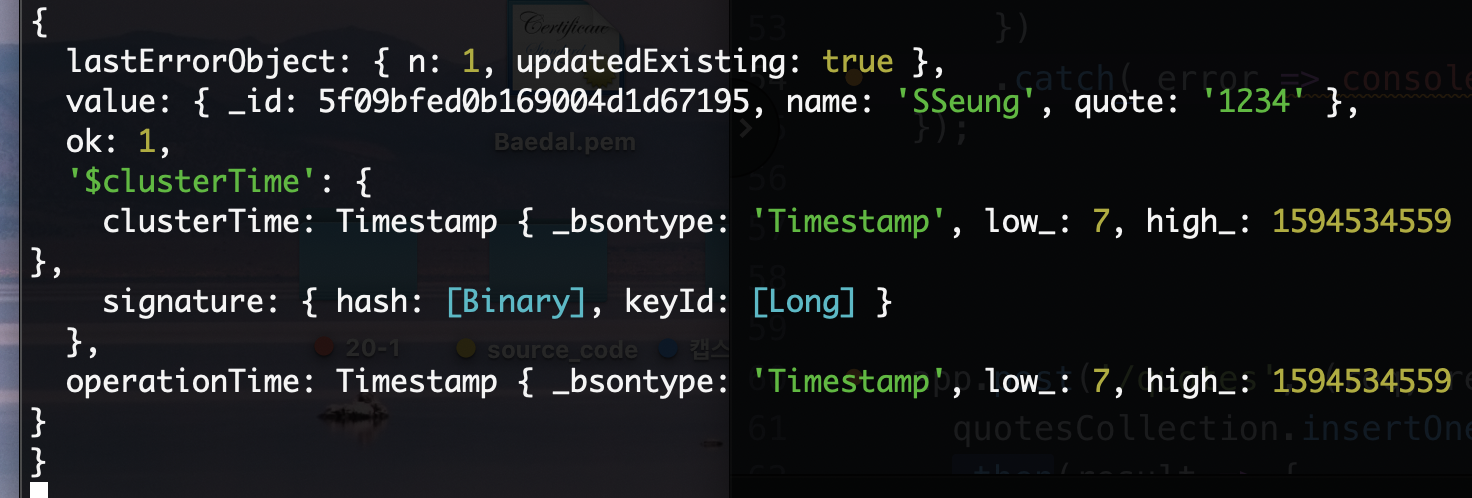
.then( result => {
console.log(result)
} )
.catch( error => console.error(error))
)
}
8. 위의 method를 거치고 난 후, 자바스크립트에 PUT request를 보낸다.
<전체 main.js 코드>
// main.js
const update = document.querySelector('#update-button');

update.addEventListener('click', _ => {
  // Send PUT Request here
  fetch('/quotes', {
  	method: 'put',
    // server에 우리가 보내는 JSON data의 Content-Type을 설정해줘야 한다.
    headers: { 'Content-Type' : 'application/json' },
    // JSON으로 보낸 데이터를 변환해야 한다
    body: JSON.stringify({
    	name: 'BabO',
      quote: 'This is changed quote. Surprise!!'
    })
  })
  .then(res => {
    if (res.ok) return res.json();
  })
  .then(response => {
    // console.log(response);
    window.location.reload(true);
  });
});
< CRUD - DELETE >
1. index.ejs에 delete button 생성하기
2. main.js에서 버튼을 눌렀을 때 일어날 이벤트 설정하기
// index.ejs
<div>
    <h2>Remove BabO Vadar!</h2>
    <p>
      Delete one BabO's quote. Does nothing if there are no more BabO's quote
    </p>
    <button id="delete-button">Delete BabO's quote</button>
  </div>
  <div id="message"></div>


// main.js
// main.js에서 delete 버튼을 눌렀을 때 생기는 이벤트 설정
deleteButton.addEventListener('click', _ => {
  fetch('/quotes', {
    method: 'delete',
    headers: { 'Content-Type' : 'application/json' },
    body: JSON.stringify({
      name: 'BabO'
    })
  })
  .then(res => {
    if(res.ok)  return res.json();
  })
  .then(data => {
    window.location.reload();
  });
});

// server.js에서 일어나는 일들
app.delete('/quotes', (req, res) => {
		//MongoDB에서 데이터 삭제하기
		//findOneAndUpdate와 형식 유사
		//main.js에서 fetch를 통해 이미 name을 전송함
		quotesCollection.remove(
			{name: req.body.name }
			//options은 생략 가능, 이 경우에 설정할 부분이 없음
		)
			.then(result => {
				//javascript로 다시 결과를 보내줌!
				res.json("Deleted BabO's quote")
			})
			.catch(error => console.error(error))
	});
https://peachsoong.herokuapp.com/
Star Wars Quote App
Remove 기능 BabO가 쓴 글을 지우자. BabO가 쓴 글이 아무것도 없으면 밑에 변화가 생긴다! Delete BabO's quote
peachsoong.herokuapp.com
위의 주소로 들어가면 heroku를 통해 무료호스팅한 crud 게시판 웹 사이트를 보실 수 있습니다.
heroku 호스팅 방법은 다른 게시물에 포스팅되어 있습니다!
github.com/ChoiSeungA/MongoDB_CRUD.git
ChoiSeungA/MongoDB_CRUD
Contribute to ChoiSeungA/MongoDB_CRUD development by creating an account on GitHub.
github.com
위의 깃허브에는 MongoDB, Express, Node.js를 이용한 CRUD 게시판의 전체 코드가 있으니 참고 바랍니다. :D
'nodejs' 카테고리의 다른 글
| sqlite, Node.js, Express를 이용한 CRUD게시판 만들기 (2) | 2020.07.16 |
|---|---|
| Node.js, Express, MongoDB - CRUD 게시판 만들기(1) (0) | 2020.07.11 |
- Total
- Today
- Yesterday
- CORS
- redux
- 프로그래머스
- axios
- 이것이 취업을 위한 코딩테스트다
- dfs
- React
- 파이썬
- 소프티어
- 기초
- 상태관리
- reactjs
- html
- CS
- springboot
- 이진탐색
- React.FC
- TypeScript
- nomadcoder
- css
- 노마드코더
- JavaScript
- 이것이코딩테스트다
- Hook
- 자바스크립트
- 이코테
- 면접을 위한 CS 전공지식 노트
- level1
- level3
- programmers
| 일 | 월 | 화 | 수 | 목 | 금 | 토 |
|---|---|---|---|---|---|---|
| 1 | 2 | 3 | 4 | 5 | 6 | |
| 7 | 8 | 9 | 10 | 11 | 12 | 13 |
| 14 | 15 | 16 | 17 | 18 | 19 | 20 |
| 21 | 22 | 23 | 24 | 25 | 26 | 27 |
| 28 | 29 | 30 | 31 |